You are currently logged-out. You can log-in or create an account to see more talks, save favorites, and more. more info
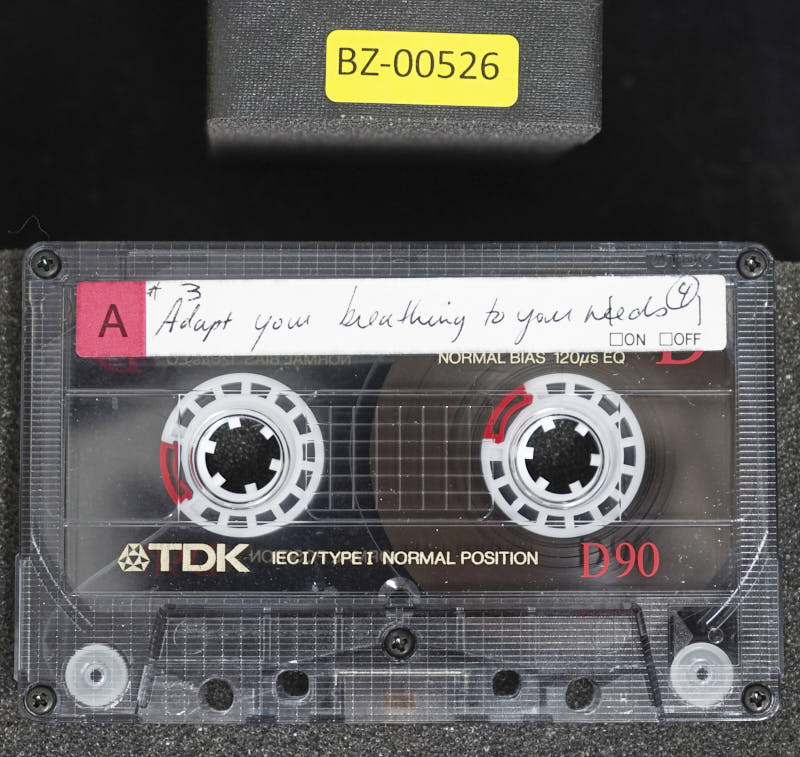
Adapt Your Breathing to Your Needs
Lie on your back, drop your knees, and cross your right leg over the left, or the right knee over the left knee. And now toss, or bend, or lower both knees to the right, as if the weight of the right knee tends to move the knees to the floor. Of course, both knees, therefore, will move around your left foot, which stands on the floor. Your hands are on either side of the body, palms downwards, and now rock both knees or tilt them to the right and back again.
[01:06]
It is as if you drop your knees to the floor and then bring them back again to the initial position with the right knee crossed over the left. While you do that, of course, Observe what your pelvis does. It's of course the pelvic bone where the muscles around it that move the pelvis and moves the knees to drop, to go down in the direction of the floor. And therefore the left hip joint is lifted off the floor and of course gradually, also the chest. And of course, every movement like that makes the knees come a little bit lower with less effort.
[02:11]
Keep on repeating that movement, means dropping the knees to the right and bringing back to the standing position. following or scanning with your attention the movement of the pelvis and the pull on the spine because while the pelvis twists like that, the spine is pulled and is pulled until you can feel the pull on the head, your chin being a bit lowered and brought back to its position when you return to the initial position with the knees, with the legs, with the pelvis. So keep on dropping the knees to the right and trying to follow through your skeleton, through the pelvic bone, through the vertebrae of the spine, of the lumbar region,
[03:28]
keep on doing the movement while listening, and then you will feel also that some of the chest vertebrae are pulled, and then the cervical spine, or cervical spine, means the neck muscles, the neck vertebrae, and then you can feel the head being rocked gently, the chin a little bit near to the throat, and away from it when you're back in the initial position. And another few moments. Slowly. Not only when do you breathe in, when you come to the initial position, or when the knee drops to the right, in the direction of the floor. Or maybe you breathe in when the knees come to the rest to the right and to the middle.
[04:39]
Just give yourself a clear account of what you're doing. Become aware of what you are doing while doing this move. Now, come to the initial position, take off the right leg, and put both feet on the floor, then both knees are drawn up then, and both feet are on the floor, comfortably spread. And now, raise both arms in the direction of the ceiling. and touch with both palms as clapping, as if clapping with your hands. So both hands, both palms touch, and both arms are straight up in the air with straight elbows.
[05:49]
And if you think of it now, you will see that both arms, with their hands like that joined, with the palms and the shoulder girdle form an isosceles triangle. Now, this triangle, keep it undeformed. It means don't bend the elbows, don't slide the hands up and down. Keep that position, the situation of both arms, the hands and the shoulders, shoulder girdle, as they are now. And now slowly rock your chest and the shoulder girdle to the left, so of course both hands will go down in the direction of the floor. But don't move a lot, just a little angle, so that you don't have to bend your elbows or make your hands slide on one another.
[07:00]
and come back to the initial position. And again, repeat the movement. It means rocking the chest with both arms straight and not sliding on one another, the hands not sliding, the elbows not bending, especially the left elbow not bending. And you tilt the undeformed triangle like that in the direction of the floor. And back to the middle. And again. And slowly note, while your right shoulder blade is lifted when they move to the left like that with an undeformed triangle, the head also tends to look at your hands while they go down. Do so. Follow your hands with your eyes. And of course you will find yourself going a little bit lower than before and then come to the middle again.
[08:09]
And again to the left with both arms, not bending the elbows and not gliding, not sliding on the palms. You go again, the whole body to the left like that. And of course, you will notice that while you move like that, the chest, the shoulder girdle, and the triangle to the left, looking at your hands going down, you'll find yourself pushing with the right leg, with the right foot on the floor more than the left. And now, tilt it like that to the right. Maintain the knees more or less standing. Don't drop the knees too while you drop your hands to the floor. Repeat it again.
[09:15]
You come to the middle and move to the left. Now, come with your hands holding the triangle of the arms and the shoulder girdle undeformed as low as you can without straining. Look at your hands and stay there a few seconds. And then, while staying like that, try to remove excessive tension or useless work all through the body, and especially your breath, and the comfortable expression of the face, not biting your teeth, not holding your breath, not squeezing the eyes. Keep your face comfortable, where it is,
[10:20]
Now come back to the middle. Put your hands on the floor on either side of yourself with the palm downwards. Cross again the right leg over the left. And drop both knees as you did before to the right. But in the first movement, observe whether you don't go lower than before, making no greater effort, and just think how come that the movement of the upper body with your arms under form, as you did to the left, helps the knee to drop lower to the floor on the right. If you can sense that, not know it, but sense it through the body, that the movement of the arms to the left and the upper part of the body to the left as you did, actually
[11:43]
helps the pelvis to twist a little bit more to the right. If you can sense that through the body, you will find that the movement improves still further. Now, stop it. Crossover. the left leg over the right, both hands on the floor, left leg, left knee over the right, and drop both knees or tilt them in the direction of the floor to your left. Note, of course, that the first movement to this side is different from the last moment to the right in extent and in effort and in sensation.
[12:48]
So, repeat it. Come back to the initial position in the middle and drop your knees to the left. And come to the middle and drop your knees to the left. And again. And again. And again, pay attention to dropping the knee to the left means raising the right hip joint from the floor. And it means also pulling the whole spine until the head so that the head rocks a little when the knees goes down. The knees go down to the floor, to your left. Your chin is drawn in. And when you come to the middle, to the initial position, the pelvis pushes the spine and brings the head to its initial position too.
[13:54]
And again, drop your knees to the left, following through the movement, feeling how the movement of the knees are connected to the skeleton, to the spine, to the ribs, to the vertebrae of the neck, to the head, to the skull. And again to the middle and again to the left. And now when you come down with the knees to the left, As long as they have come, stop and hold like that and stay there a minute, like that. Only see whether there is unnecessary strain in the face, unnecessary holding of the breath, and the necessary effort in the feet, in the thighs, in the abdomen, everywhere in the body.
[15:04]
And now come back to the middle. Uncross means lift your left leg and put both feet equally on the floor. Therefore, both knees are drawn up and you stand on both feet on the floor. Raise your arms to the ceiling and bring your palms in contact with one another like you're clapping with your hands and stay like that. And again, you have that triangle, both arms and the shoulder girdle. And of course, tilt the lot to the right. And from the start, follow the hands with your eyes. move a little angle and come back to the middle.
[16:07]
And of course you can feel now that you have to push the pelvis with your left foot more than the right so that the pelvis, the left side lifts and therefore enables you to twist the chest and the spine and the under form triangle. That means not bending the right elbow and not gliding or sliding with the hands on one another. You go to the right and come back to the middle. And again, pushing with your left foot, the knees practically standing, not tilting the knees, only the pelvis, the chest and the triangle of the arms and the shoulder blades. the shoulder girdle to the right, following the arms with your eyes, following the hands with your eyes.
[17:14]
And back to the middle. And again. And again, of course, note that while you're listening to your left foot, your hip joints, the spine, the movement of the head, your breath. With each movement, your arms, the triangle, your hands go nearer to the floor than before. And again to the middle. And again, to the right. And now, go as far to the right as you can without effort and stay there. And again, breathe freely. That means not holding the breath. Clear your face from any tension.
[18:23]
And stay like that. A few seconds. And back to the middle. And then put your hands on the floor with the palms downwards on either side of the body. Cross your left leg over the right again and tilt or drop your knees to the left. And again, note whether they come lower than before with less effort. That means that some sort of relaxation is occurring throughout the spine, ribs and chest, so that the spine twists easier, pelvis moves more around the shoulders and easier. Now, tilt your legs as low as they will come without effort and stay like that.
[19:34]
Check again that you're not holding your breath. And again to the middle. Stretch out. Rest a little. And note the way the body flattens itself to the floor, becomes longer, and more parts of the body touch the floor than in the beginning. And now drop your knees again. And stand on both feet with drawn up knees, with knees bent. And now raise your arms like before to the ceiling. Touch with the palms like clapping, as if clapping with your hands.
[20:44]
And now tilt your arms, the shoulder girdle to the right, down to the floor in the direction of the floor and to the middle, go to the middle and go over to the left and then again through the middle to the right in one continuous movement right down in the direction of the floor, then over the intermediate neutral position down to the left. Just observe how the pressure on the floor alters from one foot to the other. When you go to the right, it's the left foot that works a little louder, and it's the left hip joint that lifts.
[21:51]
And of course, the eyes follow the hands to the right. And now when you go through the middle, just slowly, and over to the left, It is the right foot now that pushes the floor and the right hip joint lifted and the spine twisting that way to help your head to look at your hands, to make the hands come down to the floor, lower to the floor. And again, through the middle to the other side. And while the movement becomes familiar, Just make it a little bit faster to the right, with no hurry, just more comfortably faster, not trying to be particularly slow. Go to the left and to the right again, and left and right again.
[22:59]
And if you pay attention to move your hands a little bit higher than just against your shoulders, means a little bit closer to the head, just a tiny bit, you will find it going down with your hands lower than before. Same thing to the right. It means that when you go near to the floor, the hands are a little bit above the shoulders, just a tiny bit. And again, rock over to the left and to the right. And note whether you're coming closer and closer to the floor. And stop it. Put your hands on the floor with the palms downwards. Your knees still drawn up, standing on the feet.
[24:08]
And note how your back lies now. Which parts touch clearly so that you say, ah, it wasn't like that before. And now, lift the left arm and put your right arm underneath your left armpit to get hold of the left shoulder blade, means the ribs shoulder blade on the left with your right hand. So, you put your right hand underneath the left armpit to hold the ribs or perhaps the shoulder blade, the left shoulder blade with the tips of your fingers.
[25:19]
And now cross over the left hand, over the right arm and hand and get hold. of the ribs and shoulder blade on the right. It means you hug yourself, in fact, with your right hand underneath or under your armpit, left armpit, and the left over the right, holding the other side. And in this way, hugging yourself like that, try to rock the chest and the shoulder blade and the shoulders right and left.
[26:21]
Means you move the upper part of the body to the right, chest to the right, and of course you'll find your head moving together with the shoulders and the arms, hugging yourself like that, you move to the right, and then roll the chest and arms to the left. You can help by pulling, of course, with your fingers, the shoulder blade, the chest, to the left, and then again to the right, all the time, moving with your eyes to follow the elbows to the right and then to the left. And of course you will note again that it is leaning once on the right foot a little bit stronger that enables you to lift the right hip and therefore roll the shoulders or the hugged body to the left
[27:34]
and then go over to the right. And then, of course, it's the left foot that pushes the floor. Follow how the push of the foot to the hip joint, to the pelvis, to the spine comes to the head and moves the head actually together with the shoulders. and back to the left, and gradually make the movement small but nimbler, easier, faster, nimbler, and nimbler, in the middle, nimbler, faster, [...] faster. Make it slower but extend the angle of rotation of the chest to the right more and to the left more.
[28:47]
Slower. moving your eyes down to the floor to the left and then down to the floor to the right and note that while you do that the body twists actually more and more and now again accelerate the movement make it nimble and stop it. Stretch out your arms and your legs and observe what it feels like in the shoulder blades, in the chest, in the hips. and drop your knees again with your feet comfortably apart, standing on the floor.
[30:08]
Now hug yourself as you did before, means your right arm under the left armpit and the left arm over the right, the left hand and arm over the right one to hold your right side. And now Think of your arms and now change them over. That means put the left arm underneath your right armpit and the right arm crossing over. And again, begin to tilt, rock the chest and the head left and right and left and right, following with your eyes, the movement of the elbows, and moving your eyes more to the right than the elbows, and more to the left than the elbows, and gradually, comfortably noting how the movement increases.
[31:26]
And the head, the eyes go lower, and the body rolls a little more to the left and a little more to the right. And gradually make the movement nimbler and nimbler and accelerate and make it faster and faster so that you rock with a quite a rapid 1, 2, 3, 1, [...] 1. Though the movement may be smaller. Do several fast movements like that. And then slow down, increasing the amplitude to the right and the amplitude to the left.
[32:29]
Now stop it. Stretch out your arms and legs. and rest a little. And now, spread your feet intentionally, not much, not more than your shoulder-wide, but leave the heels on the floor. And now, raise your arms to the ceiling, in the direction of the ceiling, Again form that unformed triangle, the two arms, the hands touching, the palms touching, like if you clapped your hands and stayed like that. And now making sure that the elbows don't bend and that the hands don't glide or slide on one another.
[33:48]
Tilt both arms to the right. With your eyes to the right, following your hands. And to the left. And to the right. And to the left. And observe, of course, that when you tilt to the right, it's the left heel that assists you. And to the left, it's the right heel. And keep on going like that from one side to the other. And observe only how far do the arms or the hands come from the floor.
[34:50]
How far are they? And now, pay attention, bend the left knee, draw the left knee only, so that you stand on the left foot and the right leg is still long and the right heel touches the floor. And now, tilt your hands as before, raised to the ceiling in that underformed triangle. Tilt them to the right and observe how far are they from the floor. And then tilt them to the left and see how far they come from the floor. And, of course, you will find that they go nearer on the floor to the right side. But that is not because the knee is standing. If the spine were supple and the hip joints free, there is no reason that you should move the same amount left and right.
[35:58]
And, of course, you will move once you become aware of where you hold unnecessarily. So try again. Make sure that you can actually, if you don't stiffen your left hip joint, go with your hands to the left as low down to the floor as to the right. And now change over your legs, that means drop the right knee and stand on the right foot and the left one, left leg with the heel on the floor, long and with the heel on the floor. And now tilot your arms and note of course that now the right hip joint can help easier.
[37:02]
But if the right hip joint stops stiffening while you move to the right, you can go as low to the right in spite of the leg standing. And again to the left. And again to the right. And now bend both knees, means draw up the left knee too. Now, both feet on the floor. Tilt your arms like that and pay attention not to bend the elbows, not to bend the left elbow when you go to the left. and not the right elbow when you go to the right, and not glide or slide the hands.
[38:03]
And move now to the right and see whether you can touch the floor or nearly with your hands. And the same thing to the left. But don't strain to touch. It will come gradually by itself with the next movement that we do. And now, observe, your head was moving all the time, following with the eyes, your hands to the right and then to the left. Now, keep on moving your arms and using your legs as you did, lifting the left hip joint to go with the hands down to the right, but While you move your hands to the right like that, turn your head to look left.
[39:04]
Now come to the middle and see your hands up in the direction of the ceiling. And now, simultaneously, while you move your shoulder girdle and chest and arms to the right, twist the head and eyes to look to the left, but without straining the neck, just a simple movement. It means from the middle, the eyes move away from the hands, the eyes to the left and the head, the eyes, face and the head to the left, while the arms go to the right, and they come straight back to the middle, And then again, eyes and head to the left while the arms go to the right. And now continue going over the arms to the left and the eyes to the right.
[40:10]
And so keep on moving the head and the eyes in the opposite direction from the arms, both going down to the floor as far as they will go. It means the eyes to the right while the arms go to the left, and then through the middle, the arms to the right and the eyes to the left. And again, and again, and make the movement simpler, easier, and observe the movement of the pelvis. and the tilting of the legs, of the arms, and the movement of the head and the eyes in the opposite direction. And now stop and try again. Tilt your arms to the right, undeformed as they are, the hands together.
[41:18]
to the right and follow with your eyes the hands and see whether you can touch the floor now or whether the hands come nearly down to the floor. Most likely they do touch the floor. And then go over to the left to the left with your eyes following. And now stretch your legs and do the same thing, one movement to the right and one to the left and see whether you can reach the same distance from the floor or touch the floor with the legs long, with the help of the heels only.
[42:29]
And stop it. And now just cross over the right leg over the left. and tilt your legs to the right and see how different that is from what you did in the beginning. And now uncross the legs and cross the left over the right and tilt both knees to the left and see whether there is an improvement there too. whether it's different from the beginning. And slowly get up. Get up. Walk around. And appreciate what changes have occurred in your body and in your nervous system and in your muscles.
[43:36]
And what it feels like after that. And of course, this is lesson number five, page 109 in your book. Thank you. Please lie on the floor. Spread your legs comfortably. Bend your knees so that your feet rest on the floor, with both hands on either side of your body, with the palms downwards. And now, breathe in, raising your chest, breathe in, raising your chest,
[44:46]
And note what happens to the small of the back when you raise your chest. Try again. Of course, breathe out and then breathe in. And raising your chest, observe what happens to the small of the back on the floor. Many people believe that they expand the chest, the whole chest, while in fact they only turn it a bit. And the chest bone moves very little. It's only the lower ribs that do some breathing. So make sure what you are doing. Try again. Breathe in, expanding your chest and note whether the small of the back touches clearer or better the floor when you expand your chest or before it.
[46:08]
Try again. And now try another thing. Push your abdomen out. It means make a movement as if pushing the air into the intestines, into the belly, so that the lower part of the belly, your stomach, rises and rounds like a football. And note whether you are doing that, the small of the back is pressed to the floor or is lifted off the floor. Now, arrange your body in such a way that both when you push the abdomen out, it means when you make that movement as if to push the air down into your abdomen, and
[47:17]
swell the abdomen round, that while you do that, it should swell all round and actually the back and the lumbar region and the small of the back should be pressed to the floor. When you do that, you will feel also some pressure on the anal ring, on the sphincter. It means that the abdomen becomes really round, round. Try again. There needn't be a tremendous pressure, just a comfortable pressure. Make sure that you can feel the anal floor being pushed while you fill your lower abdomen and round it. And that the small of the back is actually not raised of the floor but pressed towards the floor.
[48:19]
Again, when you get used to it, you can make this movement gently, easy, coming as a normal thing and not extraordinary efforts to do it. So make it simple, as simple as you can. Fill your abdomen more or less reasonably and make sure that the small of the back touches the floor, and then expand your chest, and while expanding your chest, filling it with air, watch the spine and see that the same part, the lumbar region, the small of the back, is actually pressed towards the floor, or at least not raised from the floor. Now, after you've done these, perhaps try again to make sure that you really feel the difference.
[49:39]
It means whether this lumbar region is raised or pressed towards the floor while you blow your abdomen round. or expand your chest. And now, draw in air is breathing, expanding your chest. And when the chest is expanded and filled with air, hold your breath. It means don't breathe out or in, but hold the air that you have in your lungs. And now flatten your chest and push the abdomen out. And then expand it again and draw the abdomen in.
[50:45]
And first time, perhaps you breathe out now, wait until you feel comfortable, then breathe in again, hold your breath, breathe in, expanding your chest, hold the air, And now, make that seesaw movement. It means pushing the abdomen out and contracting or compressing the chest. And the other way around, expanding the chest and drawing the abdomen in. And again, perhaps. And then again, breathe out. Wait until you're comfortable. And try again. breathe in with an expanded chest and make that see-saw movement, means compressing the chest and as if pressing the air into the abdomen and then expanding the chest again and drawing the abdomen in, means emptying the abdomen.
[52:08]
It is, of course, as if because the air is in the lungs and doesn't move to the abdomen, there is only the diaphragm. The diaphragm moves up and down and the lungs expand. But the amount of air remains the same whether you expand the chest or contract the chest, draw the abdomen in or out, it means move the diaphragm one way or the other. Now, you have probably changed the air yourself because it's too long in the beginning to hold it for such a long time. And now, try again, breathe in with an expanded chest, expand your chest, breathe in, hold the air in your lungs and make that seesaw movement of the abdomen and chest, compressing the wand rounding the abdomen and then drawing in the abdomen and expanding the chest.
[53:16]
Perhaps when you do it again, means breathe out, then breathe in again, but this time put your right hand on your chest bone and the left hand below your navel and near the pubic bone, means on the lower part of your abdomen. And now, breathe in with an expanded chest and observe, of course, your right hand being raised from the floor by the chest expanding. and the left hand falling in with the abdomen being drawn in and then the other way around. Compress the chest and push as if pushing there into the abdomen and let the abdomen swirl around, become round and again expand the chest and draw the abdomen in
[54:31]
all the time, of course, paying attention that the small of the back remains on the floor without being lifted. It means that the spine flattens and flattens through both the movements of the chest and abdomen. Neither of them needs raising the small of the back of the floor. The lumbar vertebrae can remain on the floor when we do the one or the other movement of the chest and abdomen. Now, obviously, you have already expelled air, so try now again. Breathe out. Breathe out. It means you contract the chest and breathe out as far as you can without being strangled. Breathe out and now with the air out of the lungs, means the lungs empty of air or more or less empty because they can't be completely emptied.
[55:45]
There's always residual air in the lungs. So now breathe out, compressing the chest, flattening it so that your right hand feels that chest bone is coming down, lowered. Breathe out like that and now draw the abdomen in and expand your chest, holding your breath, not taking any air in. Perhaps try again because at the beginning it may be difficult. Now try again. you will be moving the chest and abdomen like before, with the right hand on the chest bone and the left on the abdomen, but to begin with empty lungs or nearly empty lungs. You breathe out and then you hold your breath and now
[56:47]
Do again that seesaw movement of the chest and abdomen as many times as you can without having to breathe in again. And of course, breathe in, wait a second, and then try again. Breathe out, empty your lungs, and hold your breath and then again make the alternating movement of expansion and drawing in of the chest and the abdomen. And of course with each trial you can do another movement or two of the seesaw movement of abdomen and chest. Now, breathe in again and slowly empty your lungs and try again.
[57:53]
Move the chest and abdomen up and down, alternating, one expanding, the other one drawing in, then the chest contracted or compressed and the abdomen rounded. And again, breathe in and slowly breathe out, contracting the chest, of course. And then again, holding the breath, not breathing in, make some movements with the abdomen and chest. three, perhaps four alternations, and then breathe in. And change your hands.
[58:58]
Put the right hand on the lower abdomen and the left hand on the chest. And now breathe in again, expanding your chest. filling your lungs with air, and hold the breath, and then make the alternating movement of the abdomen and chest, but this time a little faster, trying to make as many movements as you can, as many seesaw movements of the chest and abdomen, while you have your lungs filled with air. And of course, Stop it, breathe out. Wait a second or two and breathe in again with an expanded chest. Hold your breath and alternate the movement of the chest and abdomen a little faster so that you can make perhaps half a dozen movements on one breath like that.
[60:09]
And again. Breathe out, wait a little. And then this time empty your lungs even more. Compress your chest and hold your breath. Don't take any air in. And while holding the breath like that, Make as many alternations of the chest and abdomen, drawing in the one, expanding the other, as you can without hurrying, but make them faster. And of course, stop it and try again. Breathing in, And this time, when you have actually succeeded going very fast, making the alternation rapid, you will probably become aware of something flopping up and down in the abdomen.
[61:23]
That's the only occasion on which we can become aware of the movement of the diaphragm. Otherwise, we don't feel the diaphragm. But this, when we get to a fast alternation of stomach drawing in and expansion of the chest, the diaphragm of course moves up and down while we do that, and when we go very fast, the movement affects the liquid in the stomach and thereby we become aware of the movement of the diaphragm up and down. Try it once with empty lungs and holding the breath and make fast movements of seesaw movement of abdomen and chest.
[62:25]
And again. fill your lungs and do very rapid movements. And in one of the cases, you will become aware of that movement I'm talking about, which is the sensation or the roundabout sensation of the diaphragm moving up and down. Stop a minute, lie at rest as you are with both hands on either side of the body and consider what happened which is contrary to our normal beliefs about breathing. First, you convinced yourself to your own experience with your own body that you can breathe in and out with the chest expanded or contracted.
[63:34]
It means you can breathe, have your lungs full of air while the chest is compressed or expanded. and while the abdomen is compressed or drawn in or expanded. In other words, expanding the chest does not prove that your lungs are full of air. Just like contracting the chest, compressing it, doesn't mean that you have no air in the lungs. The same holds good for the movement of the diaphragm with your abdomen. In other words, breathing is not as simple as we believe just by moving the chest or diaphragm we breathe this way or that way.
[64:42]
Breathing can be done in many, many ways and good breathing is not expanding the chest or drawing in or drawing out air at a given rate, but good breathing means that we can breathe and supply ourselves with sufficient oxygen and expel sufficient CO2 out of the lungs. so that we are capable of great exertion, violent movement, rapid movement, prolonged exertion. And for that, we have to have all the parts that cooperate in breathing so trained that each of them can do his normal part in regular breathing.
[65:49]
and is capable of doing more than his share when necessary, and less than his share when necessary. For in each position, and in each situation, and in each posture, we breathe differently. We will soon see it through our own experience. that none of the rules that are commonly accepted for breathing are really correct, essential, or really necessary. They can be used, that's one way of breathing, but certainly not the one which enables one to breathe properly when swimming, when diving, when dancing, when running, when jumping, when making love, for doing anything, running after a bus, or being scolded, or being beaten up, or when you hit somebody else.
[66:58]
In every one of our movements, in every one of our moods, in every one of our postures, and in every one of our situations, we breathe. with different parts doing more or less work. And therefore, to have a healthy mind and a healthy body, it means so to train the breathing parts, which are not only the chest bone And the diaphragm, as you will see, as you have already seen, but the ribs, the lower ribs, the floating ribs, and other parts of the chest,
[68:08]
Each one has to breathe properly and improperly so as to make all the functions of life possible in comfort and with sufficient ventilation and sufficient oxygen to allow us to do what we need or want to do. So let us try and see how we can actually train each part to do more than its normal share so that breathing can be done in all those situations and postures that you may find yourself doing. First, lie on your stomach. Lie on your stomach.
[69:10]
Spread a bit your knees. Put both hands on the floor on either side of the head, with the palms on the floor. Elbows bent. Somewhere where it's comfortable to lie. And now, expand your chest and breathe in. But try to feel or sense whether you expand the right side of the chest as much as the left, or less, or more, and you will see that it's not so easy to find that Now, when you breathe out and now round your abdomen by compressing the chest and pushing the abdomen down and see whether you can tell whether you press the right side of the abdomen
[70:43]
as clearly as the left? Of course, it's not important to find that out, but this will show you whether you use the muscles of the chest, of the ribs, of the back, of the diaphragm equally on both sides. Some people have one side functioning properly and the other one Almost nothing. And the same thing in the chest. Some people breathe with one part of the chest or with one side, with one lung and not with the other. Or not equally. Actually, they are not equal anyway by structure. But, try again now. Lying as you are, breathe in now intentionally, breathe in so as to make your left chest, the left side of your chest, press the floor clear.
[71:49]
You turn a little bit on the left and make sure that you can feel the pressure of the left side of your chest expanding against the floor when you breathe in. Then, breathe out, and of course on breathing out the chest is compressed. Now, move the right side of the abdomen. Tilt your pelvis so that you press on the floor with the right side of your abdomen. So that you do it intentionally, clearly with the right side. And again, breathe in and feel the left side of the chest. You turn your chest, you roll slightly to the left with the chest so that you can feel the left side of the chest expanding against the floor. And then again, tilt your pelvis to the right and feel the right side of the abdomen pressing the floor.
[72:52]
And do it a few times like that, slowly, making sure that you feel the floor being pressed by the left side of your chest and by the right side of your abdomen. And now stop a while. and just make sure what you sense now in the chest and abdomen and now do the same thing again that means filling your lungs with air but this time press the right side of the chest to the floor Mistilt your chest so that when breathing in, you can feel the ribs of the right side and the sternum, the right side of the sternum or the chest bone pressing against the floor.
[74:05]
And of course, on breathing out, press the lower abdomen on the left side. Mistilt your pelvis so that the left side of the abdomen is pressed against the floor. And again, the right side of the chest, and the left side of the abdomen, and the right side of the chest, and the left side of the abdomen. And now, stop it and lie a minute still, But while you breathe in and out, note whether you can tell now whether both sides of the chest expand equally or whether both sides of the abdomen expand equally.
[75:13]
Of course, if you pay attention, you will soon realize that as soon as you know that they are not equal, you can equalize them. But if you don't know whether you do breathe with one side more than the other, how on earth can it be corrected? Nobody can do it for you. That means unless you know what you're doing, you have a chance of improving it. And the chance comes immediately, you know, you become aware of what you're doing. As soon as you know what you're doing, there's little difficulty in doing what you want. Now, roll on your back. Roll on your back. Bend your knees with your feet spread comfortably and this time raise your head and shoulders high so that you can lean on the floor with your forearms, elbows and palms.
[76:44]
It means you rest with your forearms, elbows and palms on the floor to support the shoulder girdle and the head, which are up in there. So, if you place your hair, your elbows in the right place, not too near, not too much forward, not too much backwards, but so as to support squarely your shoulders, you will find no difficulty in staying in that way, in that position. And now, breathe in and hold your breath. And again do the seesaw movement of the chest and abdomen. And now you will find when you do the movement of the chest and abdomen, it's actually very difficult
[77:48]
to have the lungs so tight, the nose and throat, that no air is expelled for coming in. It can be done that you can do the movement of expansion of the chest and drawing in the abdomen and alternating these movements with breathing in in your own normal rhythm. Try it. just don't breathe in and don't breathe out intentionally, just breathe normally and keep on doing the movement of the chest and the abdomen. You will see that they just expel a little bit more than you really think and a little bit less and push in and pull in and you can breathe quite normally doing the movement of the chest and abdomen Alternately, as you did before, while holding the breath.
[78:50]
Try again. Breathe freely. And you'll see that you can gradually regain your normal rhythm of breathing in spite of the movement of the chest expanding and the abdomen being drawn in. and then the abdomen being blown out and the chest compressed or flattened. Try again until you feel you can breathe, breathe in your own way, in your own normal rhythm. It is probably slightly changed from the normal, but at least what it feels your own way, in spite of the alternating movement of the chest and abdomen. In fact, you can make them as fast as you want and still breathe normally. Try again.
[80:03]
And now, stop it, but stand on your knees, stand on both knees, the knees well apart, comfortably apart, put the right hand on the floor, or the left, whatever you feel more comfortable, and put one hand into the other, so that you can leave with your forehead, or the top of the head, just where your hair begins to grow, if you have any, and press this part of the head, means the top of the forehead, into your palm, The two, one hand and the other on the floor and your head in the palm of the hand near to you.
[81:18]
Elbows comfortably where they are on the floor and on both knees. And now, in this position, breathe in, expanding your chest. and you will find that your body goes forward because when you expand your chest you will find yourself drawing in your abdomen and when you draw in your abdomen your body moves forward and the head rolls into the arms a little bit forward, stretching your neck. and observe that the small of the back rounds itself, the whole spine becomes round. And now, press the abdomen out, down to the floor, and breathe out. And of course, the small of the back will sink and your buttocks will go back as if to go to sit on your heels.
[82:30]
And now, but of course, don't do that large movement, just draw in your abdomen, breathing in, expanding your chest. And move forward, lengthening your neck, and the body moving forward. And then press your abdomen out, breathing out, the small of the back and the abdomen sinking to the floor, the small of the back becoming rounded, drawn in, curved, together with the abdomen being drawn to the floor, and of course, your pelvis moving a little bit backwards. Repeat those movements several times. Repeat this movement several times.
[83:37]
It means moving forward and expanding the chest, breathing in and moving backwards and pushing the abdomen out. And now, next movement forward. Next movement forward. Do it the other way around. It means when you move forward, push the abdomen out and contract your chest. And when you go back, it means when your pelvis moves back, draw your abdomen in and expand your chest. It may not be so easy to do as it sounds, but try.
[84:42]
Now, that's enough. Would you please sit? Sit simply on the floor. And open your knees wide apart so that you can touch with the soles of the feet one another. And then embrace yourself. Move your right hand to touch your lower ribs on the left side and the left hand on the right side. It means you just like embrace yourself from your front to touch the lower ribs. and bend your head down and now alternate the movement of the abdomen and chest while breathing in and note how much the ribs there expand and contract while you breathe in
[85:53]
I will advise you to stop at this moment, just walk around and observe what you feel and how you breathe, the difference of sensation in the body, and then read Lesson 4 in your book, in Awareness to Movement, page 100, And next time, when you repeat the thing, don't follow absolutely my rhythm of my instructions, but for the points where you change movement. But in between, feel it your own way. Do it in your own rhythm. It means don't abide by the extractions word by word. Thank you.
[87:03]
@Text_v004
@Score_JJ